
Do you want to auto comment on Instagram without coding experience? This guide will allow you to take Instagram to the next level. But you also need to be aware of the fact that you need to be careful with this tool. If you try to auto comment too fast, your Instagram will be restricted.
If you use this tool right, though, it has huge potential for growing an Instagram account.
In this guide, we’ll show you how to do it, whether on just one account or on a mass scale. As far as Instagram auto commenting without coding experience is concerned, you will need to use a Chrome & Firefox extension called UI.Vision.
UI.Vision is a very powerful yet simple tool for automating the web browser. It’s so simple that you can learn very advanced tasks within a couple of days of using it, with the help of YouTube, forums, and of UI.Vision’s great explanation of commands. If you plan to auto comment on Instagram on more than one account, you’ll also need to get Kameleo. But we’ll talk about that near the end.
Auto Comment on Instagram Without Coding Experience
Firstly, make sure you log in to your Instagram account in your web browser. Next, go to a hashtag that’s of interest to your profile.
You have two options here. You can get UI.Vision to automatically go to the Instagram hashtag for you, or you could open it yourself.
In this guide, we preferred opening it ourselves. So we just opened up Instagram on the hashtag page of our choice. We then went down to the Most Recent section and in UI.Vision added a new command and called it Click while pressing on the first image.
Next, we took down the code that pressing on the first image got us. And repeated pressing on Select followed by pressing on the image underneath.
This resulted in us getting two almost identical pieces of code with a slight difference:
- xpath=//*[@id=”react-root”]/section/main/article/div[2]/div/div[1]/div[1]/a/div[2]/ul
- xpath=//*[@id=”react-root”]/section/main/article/div[2]/div/div[2]/div[1]/a/div[2]/ul
The 3rd last number from the right looks different, which is the difference between the image in the first row and in the second row. In that area, we replace the number with: ${!LOOP}
Your command should now read: xpath=//*[@id=”react-root”]/section/main/article/div[2]/div/div[${!LOOP}]/div[1]/a/div[2]/ul
This will allow for clicking on different images every time you are about to comment. Of course, there are 3 pictures per row. That’s why you are now going to duplicate the command twice while changing the second number from the right.
You should now have 3 Click commands like:
- xpath=//*[@id=”react-root”]/section/main/article/div[2]/div/div[${!LOOP}]/div[1]/a/div[2]/ul
- xpath=//*[@id=”react-root”]/section/main/article/div[2]/div/div[${!LOOP}]/div[2]/a/div[2]/ul
- xpath=//*[@id=”react-root”]/section/main/article/div[2]/div/div[${!LOOP}]/div[3]/a/div[2]/ul
This will result in both the images going downwards and to the side being clicked.
Next, we’ll add a Pause command at the end of each. The first one will be for 5 seconds, the second for 10, and the 3rd for 25 seconds. Put in the seconds desired in the target area.
- 5 = 5000
- 10 = 10000
- 25 seconds = 25000
Instagram auto comment requires pauses as otherwise, Instagram will limit you.
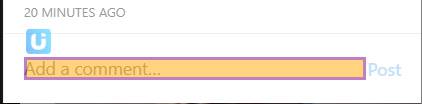
In fact, it might be safer if you only do one comment per 3 pictures by applying only one of these commands. After you’ve done that when an image is clicked on Chrome, add a new command called Click and press on Select. This followed by pressing on the comment section of an Instagram post.
At this moment, you need to create a CSV list file with Instagram comments followed by pressing on the CSV section in UI.Vision and pressing on Import CSV.

When you do that, create a csvRead command with the name of the CSV file in the target area. Next, put in a Type command followed by pressing Select and choosing the comment section.
In the target area choose the comment section, meanwhile in the value section, put in ${!LOOP}
That will result in a comment being typed in on each image.
Of course, in this case, you need to duplicate all of these commands, for every one of the 3 images in each row.
For convenience, we actually had a set of 3 different CSV files for this. That way, the first row would read from its own CSV, the second row would read from its own CSV, and likewise for the 3rd row.
Next, add a new Click command for all the rows, press on Select, and click on Post.
The last thing you will need to do? To add a line of code between all the rows, for you to exit out of a post after you comment.
To do that, add a Click command followed by pressing Select, and clicking on any area that’s outside of the image.
And just like that, you know how to Instagram auto comment without coding experience on one account. There are a few extra steps you need to take if you want to comment on more than one though so that Instagram doesn’t see you as suspicious.
How to Comment on Several Accounts at Once
To Instagram auto-comment on several accounts at once, you will need to change the parameters of your browser so that Instagram isn’t able to detect those accounts as being turned on the same device at once with the help of the browser fingerprinting.
Browser fingerprinting?
It’s websites collecting data that can be used to identify you. Based on simple data that alone isn’t of any importance, such as your screen resolution and OS version, sites like Instagram are able to detect whether users are using several Instagram accounts all at once on one device.
That’s where Kameleo comes in as a tool that is used to change browser fingerprints allowing every new window browser to look like it’s on a different device. Thus preventing accounts that you are running at the same time from looking suspicious and potentially being blocked, based on that.
Apart from Kameleo, you’ll also need to use a VPN or a proxy as you also need to have a different IP address on these accounts. How do you do this?
Download Kameleo, create your profile with proxy settings included and launch. Once launched, then download UI.Vision in that browser window. Automate Instagram comments, and then, make sure to save the Kameleo profiles for the next time as you will need to use the same settings for each profile.
As far as customizing the Kameleo profile, it’s pretty straightforward as we explain what everything means when you drag your mouse over something you don’t understand, but you can also watch one of our YouTube videos on this topic. In the future, you will be able to automate Kameleo itself so that you can carry all this out.
That’s How to Auto Comment on Instagram
Found this useful? Why don’t you check out our guide to automating Instagram likes without coding experience?
.png)

